In this post I am going to discuss about the MVC 2.
MVC stands for Model, View, Controller.
Call hirarchy works in this way that when a request is sent then it calls the Controller function. Controller interacts with View and Model and after all the rendering Controller returns back response in Html form.
I will discuss MVC completely in some other post but currently I am going to discuss on MVC 2 project.
You only need to goto File menu option and click on New from drop down menu and click on Project sub menu option.

In Visual C# Installed Templates category select the Web category option and you will be shown a list of projects in this category. In this list you will see ASP.Net MVC 2 Web Application project option also.
Click on this option.
Give the name of project and change the default path for project saving location and also change the Solution Name if required else you can start with the default settings.
Click OK button.

Hope I will post the article for Unit testing project also.

You can see the hirarchy of the MVC 2 project in Solution Explorer.
Also I have opened HomeController.cs class.
If you want to see whether your project is building and running fine then you can click on the project Debug option which I have pointed out using arrow.

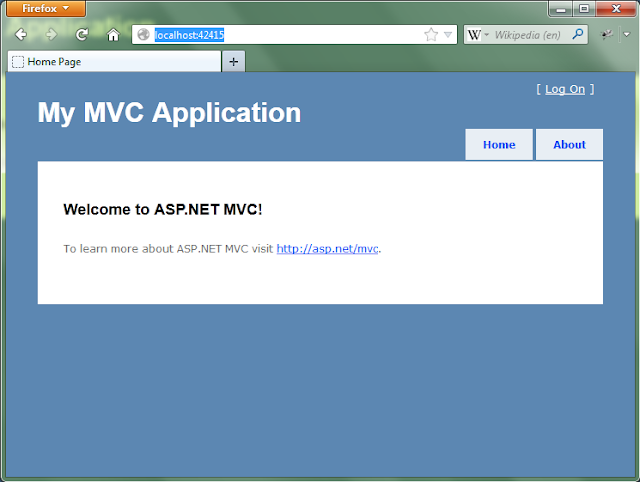
So here in the screen shot you will be shown the default Home page for the site.
Here in the screen shot you can see a controller file named HomeController.cs.
Its a convention to postfix Controller keyword with each controller class.
Its a convention to postfix Model with each model class.
All the controller classes inherit from the Controller class which is included in System.Web.Mvc liabrary.
ActionResult is the return type of the controller function since every controller returns a View or a Json result. So in the screen below you can see the Index and About controller functions returns Views.

In below screen you can see the Index and About Views in Home folder which is the name of the Controller.
So Controller functions always maps over Views. Thats might seems a bit different since in traditional ASP.Net project this is not the case.

When you click on this option you will be moved to respective View automatically.


In the below screen you can see we have created a Controller function named "Contact" and its returning a View.

Right click on the New Controller function and you will be shown the "Add View..." option.
Click on it and you will be seen a dialog.

Check the Master page option since all the Views in this example are inheriting from Site.Master page.
Click on Add button.

A new View by the name "Contact.aspx" gets added to the Home folder in Solution Explorer.
So you can see that for the Home Controller the View also gets added to Home View folder automatically thats a great beauty of MVC.
We have opened up "Contact.aspx" page and you can look it in the center part of the Window.

Hope you have found this post useful. I have discussed the basics only since its a startup turorial on MVC 2.
I will also post on Advance topics of MVC soon.
MVC stands for Model, View, Controller.
Call hirarchy works in this way that when a request is sent then it calls the Controller function. Controller interacts with View and Model and after all the rendering Controller returns back response in Html form.
I will discuss MVC completely in some other post but currently I am going to discuss on MVC 2 project.
Step 1: Creating MVC 2 Project:
I have used Visual Studio 2010 to create this MVC 2 project. Most of you may know of how to create a New Project in Visual Studio but if some one dont know then I have shown the screen below telling how to create a New Project.You only need to goto File menu option and click on New from drop down menu and click on Project sub menu option.

Step 2: New Project Form:
After the above step you will get this New Project form gets appear in Visual Studio.In Visual C# Installed Templates category select the Web category option and you will be shown a list of projects in this category. In this list you will see ASP.Net MVC 2 Web Application project option also.
Click on this option.
Give the name of project and change the default path for project saving location and also change the Solution Name if required else you can start with the default settings.
Click OK button.

Step 3: Unit Test Optional Project:
MVC project asks you to create a project for Unit testing also. Although its a very nice approach and you must follow it but since we are only going to exaplain about MVC 2 in this post so I have not created the Unit test project and selected No option.Hope I will post the article for Unit testing project also.

Step 4: MVC 2 Project Loaded:
Now you can see that our project gets loaded in Visual Studio with default settings.You can see the hirarchy of the MVC 2 project in Solution Explorer.
Also I have opened HomeController.cs class.
If you want to see whether your project is building and running fine then you can click on the project Debug option which I have pointed out using arrow.

Step 5: Running Project in Browser:
After running the MVC 2 project with default settings you can see that the project gets loaded in web browser. Visual Studio 2010 comes with a default ASP.Net Development Server and you dont need to configure the site on IIS.So here in the screen shot you will be shown the default Home page for the site.

Step 6: Home Controller Index and About Action Results:
Since you know that MVC depends upon Model, Views and Controllers.Here in the screen shot you can see a controller file named HomeController.cs.
Its a convention to postfix Controller keyword with each controller class.
Its a convention to postfix Model with each model class.
All the controller classes inherit from the Controller class which is included in System.Web.Mvc liabrary.
ActionResult is the return type of the controller function since every controller returns a View or a Json result. So in the screen below you can see the Index and About controller functions returns Views.

Step 7: Controllers and Views Relationship:
Against all the Controller functions returning ActionResult have a View associated with them.In below screen you can see the Index and About Views in Home folder which is the name of the Controller.
So Controller functions always maps over Views. Thats might seems a bit different since in traditional ASP.Net project this is not the case.

Step 8: Option to Load View From Controller:
In order to go to View you can right click on the Controller function and you will be shown the "Go to View" option.When you click on this option you will be moved to respective View automatically.

Step 9: Index View:
After following the above step you have been moved to the Index View which can be seen in the below screen.

Step 10: Creating New Controller named Contact:
Till then what we have seen is the deault settings which we see in the MVC 2 project when it gets loaded. Now in the next steps we are going to add a new controller function and then see how to add a view for it.In the below screen you can see we have created a Controller function named "Contact" and its returning a View.

Step 11: Creating a View for the Controller:
Now lets create View for this Controller function.Right click on the New Controller function and you will be shown the "Add View..." option.
Click on it and you will be seen a dialog.

Step 12: Adding View for Controller:
After following the above step you have been shown a dialog for "Add View". You can change the name of the View but its better to keep the default name to keep the things easy to remember and its a good convention.Check the Master page option since all the Views in this example are inheriting from Site.Master page.
Click on Add button.

Step 13: View Created for Controller:
Now after following the above step you can see.A new View by the name "Contact.aspx" gets added to the Home folder in Solution Explorer.
So you can see that for the Home Controller the View also gets added to Home View folder automatically thats a great beauty of MVC.
We have opened up "Contact.aspx" page and you can look it in the center part of the Window.

Hope you have found this post useful. I have discussed the basics only since its a startup turorial on MVC 2.
I will also post on Advance topics of MVC soon.